Packaging and Installing Applications
Introduction
In the last guide we ran the application locally and pointed it at a remote MSX environment. The next step is to package, onboard, and deploy the application into MSX proper.
Goals
- package MSX application
- onboard and deploy MSX application
Prerequisites
- everything from previous guide (help me)
- Docker Desktop
Configuring the Component
Before we can package up the Hello World Service component and deploy it into MSX with SLM (help me) we need to create some configuration files. The project will look like this when all the configuration files have been added:
manifest.yml
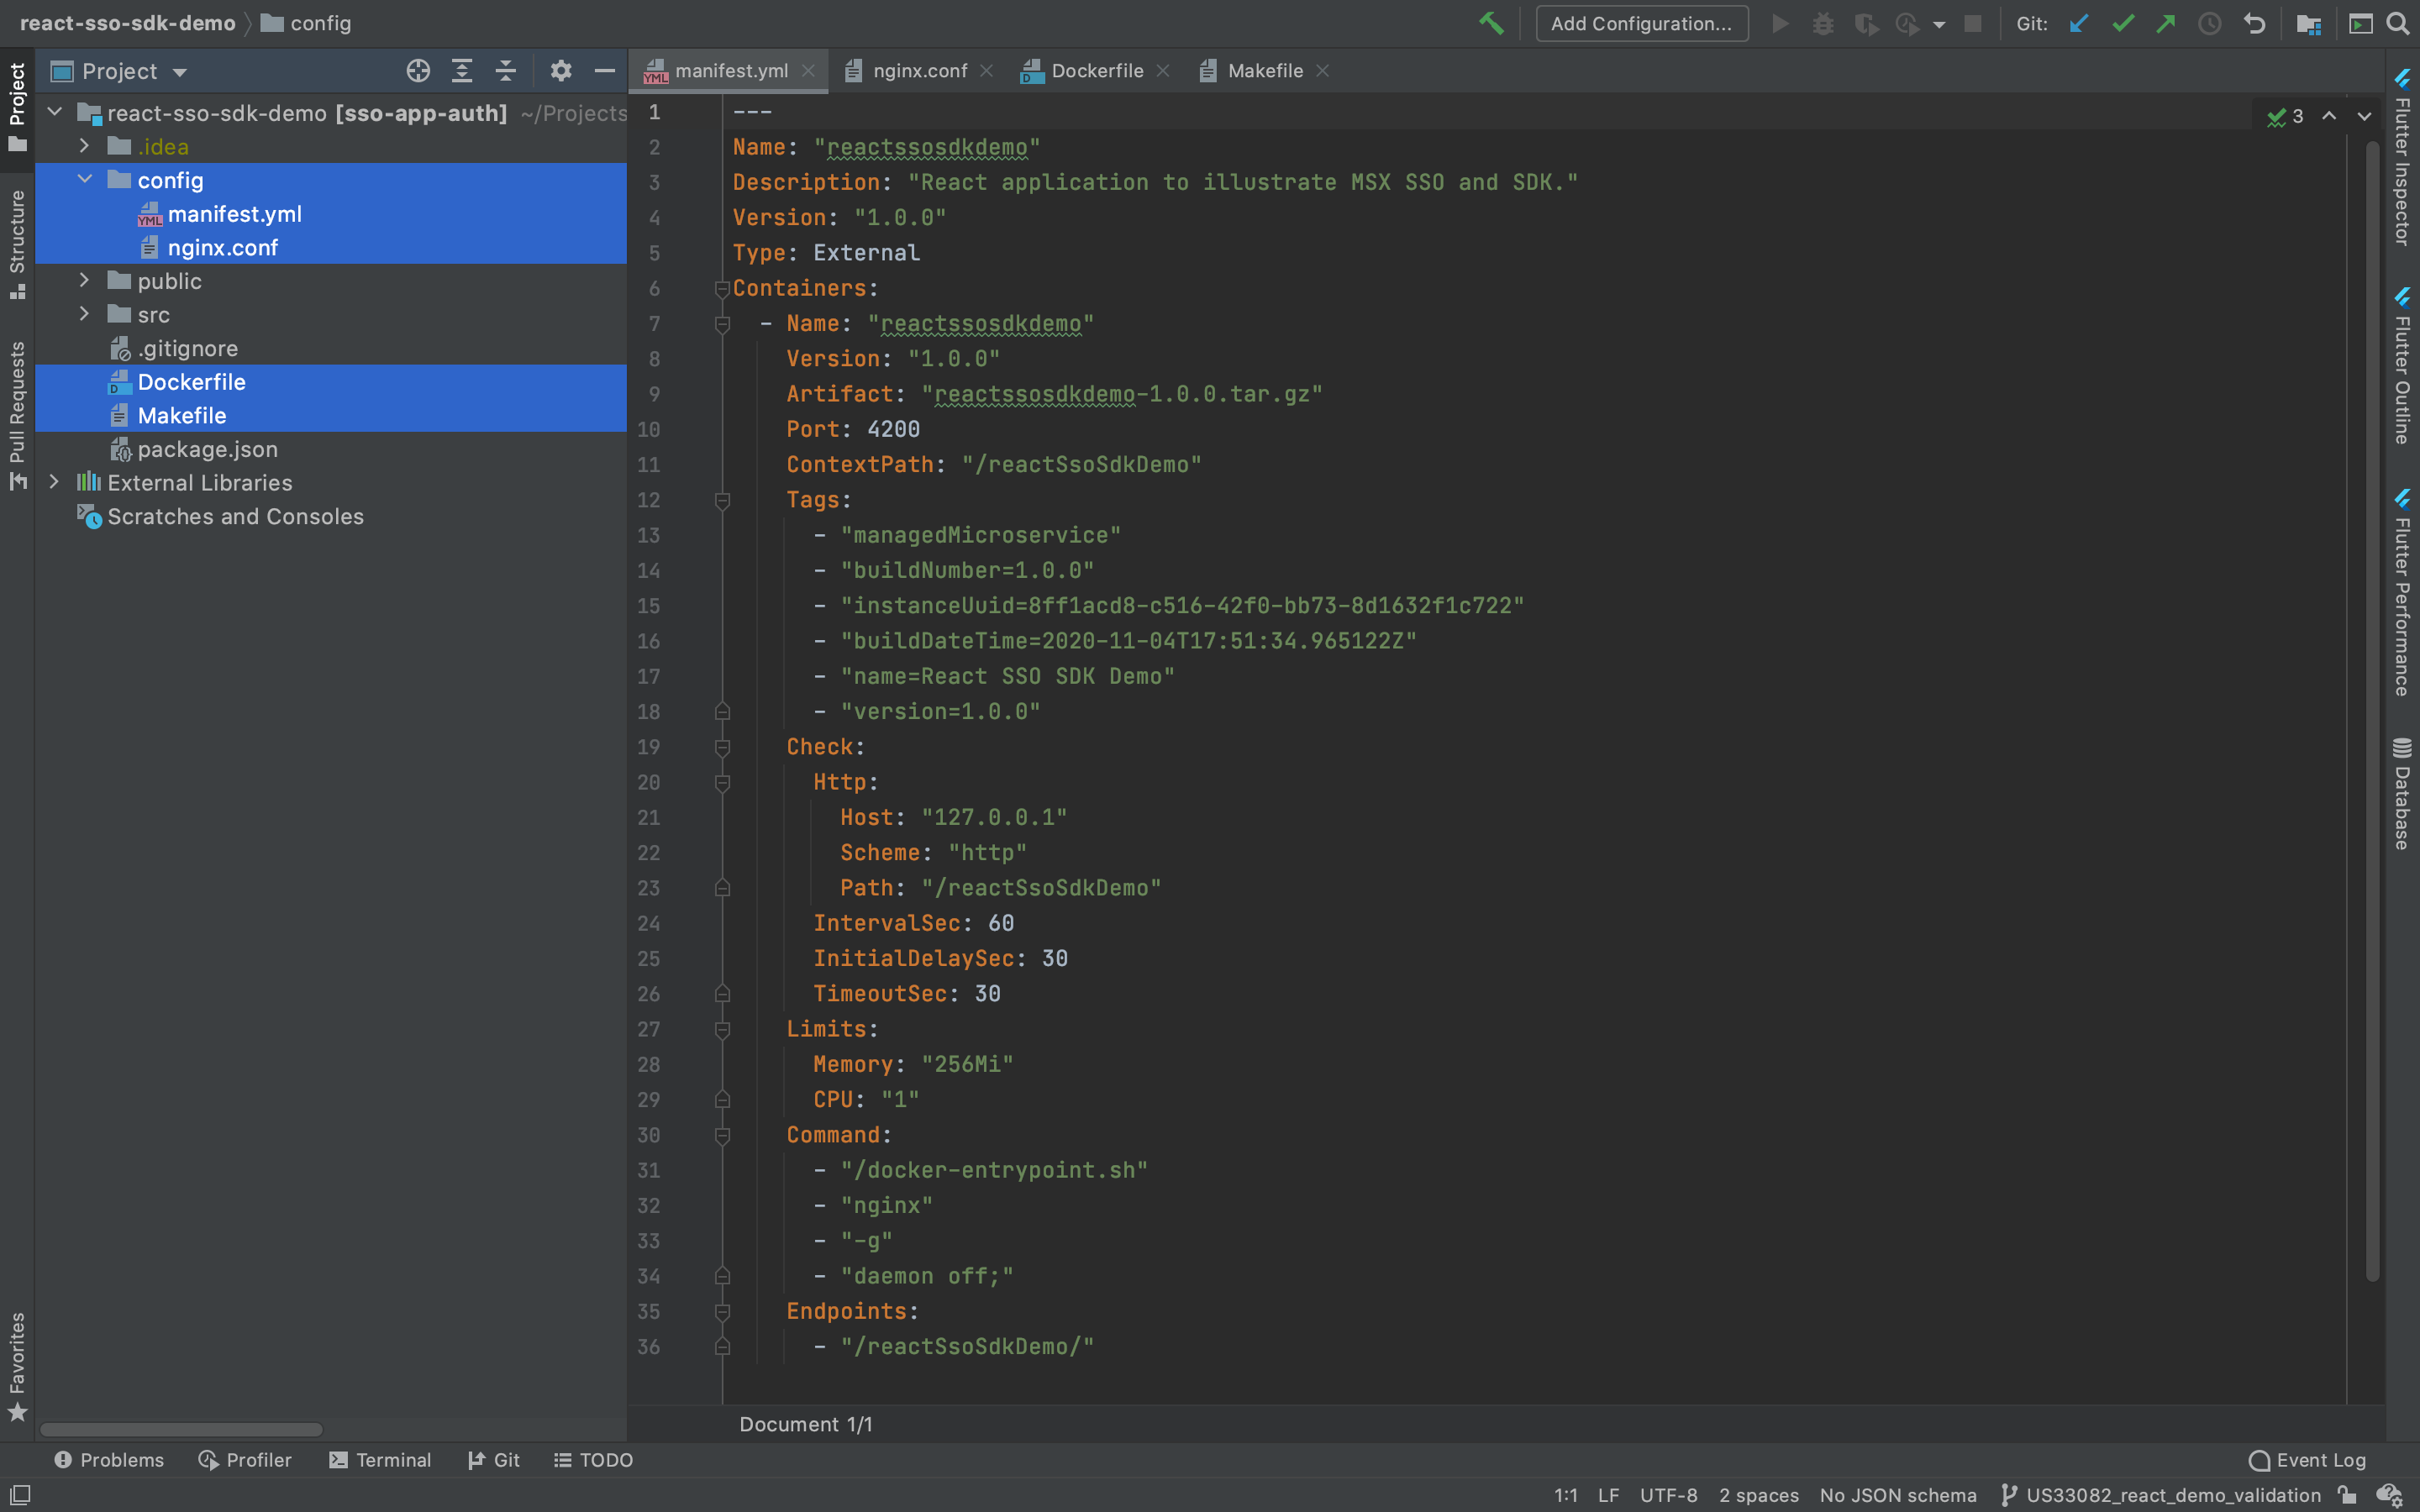
The first file is the SLM manifest which tells MSX how to deploy the associated containers. Create “manifest.yml” in the root project folder with the following contents:
---
Name: "reactssosdkdemo"
Description: "React application to illustrate MSX SSO and SDK."
Version: "1.0.0"
Type: External
Containers:
  - Name: "reactssosdkdemo"
    Version: "1.0.0"
    Artifact: "reactssosdkdemo-1.0.0.tar.gz"
    Port: 4200
    ContextPath: "/reactSsoSdkDemo"
    Tags:
      - "managedMicroservice"
      - "buildNumber=1.0.0"
      - "instanceUuid=8ff1acd8-c516-42f0-bb73-8d1632f1c722"
      - "buildDateTime=2020-11-04T17:51:34.965122Z"
      - "name=React SSO SDK Demo"
      - "version=1.0.0"
    Check:
      Http:
        Host: "127.0.0.1"
        Scheme: "http"
        Path: "/reactSsoSdkDemo"
      IntervalSec: 60
      InitialDelaySec: 30
      TimeoutSec: 30
    Limits:
      Memory: "256Mi"
      CPU: "1"
    Command:
      - "/docker-entrypoint.sh"
      - "nginx"
      - "-g"
      - "daemon off;"
    Endpoints:
      - "/reactSsoSdkDemo/"
nginx.conf
server {
  listen 4200;

  location /reactSsoSdkDemo {
    root /usr/share/nginx/html;
    index index.html;
    try_files $uri $uri/ /reactSsoSdkDemo/index.html;
  }

  include /etc/nginx/extra-conf.d/*.conf;
}
Dockerfile
Next we create a dockerfile so that we can containerize the application. Create “Dockerfile” as shown below:
# this dockerfile is used to wrap the react demo in a container for deployment
FROM --platform=linux/amd64 nginx:latest
COPY ./build/ /usr/share/nginx/html/reactSsoSdkDemo
COPY ./config/nginx.conf /etc/nginx/conf.d/default.conf
Makefile
There are several steps to containerize and package the component. This will be done multiple times during development we use a build utility, so we define a “Makefile” for convenience:
build: clean package
IMAGE = ${NAME}:${VERSION}
OUTPUT = ${NAME}-${VERSION}

package:
	npm install
	npm run build
	docker build -t ${IMAGE} .
	docker save ${IMAGE} | gzip > ./config/${OUTPUT}.tar.gz
	tar -czvf ${OUTPUT}-component.tar.gz  -C ./config manifest.yml ${OUTPUT}.tar.gz
	rm -rf ./config/${OUTPUT}.tar.gz

clean:
	rm -rf config/${OUTPUT}.tar.gz
Building the Component
To build the component “reactssosdkdemo-1.0.0-component.tar.gz” call make and pass the component “NAME” and “VERSION”. Note that you need Docker Desktop to be running for this to succeed.
$ make NAME=reactssosdkdemo VERSION=1.0.0
rm -rf config/reactssosdkdemo-1.0.0.tar.gz
npm install
.
.
.
Successfully tagged reactssosdkdemo:1.0.0
docker save reactssosdkdemo:1.0.0 | gzip > ./config/reactssosdkdemo-1.0.0.tar.gz
tar -czvf reactssosdkdemo-1.0.0-component.tar.gz  -C ./config manifest.yml reactssosdkdemo-1.0.0.tar.gz
a manifest.yml
a reactssosdkdemo-1.0.0.tar.gz
rm -rf ./config/reactssosdkdemo-1.0.0.tar.gz
Deploying the Component
Log in to your MSX environment and deploy “reactssosdkdemo-1.0.0-component.tar.gz” using the “Component Manager” in “Settings” (help me). The component will appear in the manager as shown.

| PREVIOUS | NEXT | HOME |